| |
| |  | |  | | |
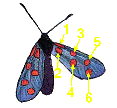
| | numbering of the spots | | | | |
| | | | | | | |
| | | | | | | |
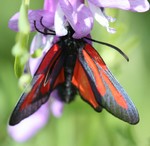
| | choice A |  | - 3 narrow red bands, of similar size
- antennae are long and show no bulge at the end
|  |  | |
| | | | | | | |
| | | | | | | |
| | | | | | | |
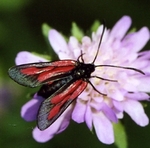
| | choice B |  | - 3 red bands (spot No.1 is elongated and forms a band which is narrower than the two others)
- antennae show a bold bulge at the end
- spots No.3&5 form a band (band 3-5) which strongly widens on the back of the wing ('comma-shaped'). The back part of band 3-5 can also show a rounded bulge, looking like a sixth spot stuck to band 3-5
|  |  | next step >> |
| | | | | | | |
| | | | | | | |
| | | | | | | |
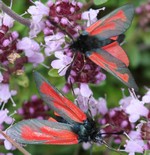
| | choice C |  | - 2 red bands (spot No.1 is elongated and spots No.2&4 thoroughly merge forming a band)
- antennae show a bold bulge at the end
- spots No.3 is tiny and usually well separated from spot No.5 (in some individuals within a whole population, spots No.3&5 can be linked with a narrow red line )
| |  | |
| | | | | | | |
| | | | | | | |
| | | | | | | |
| | | | | | | |
| | | | | | | |
| | | | | | | |
| | | | | | | |
| | | | | | | |
| | | | | | | |
| | | | | | | |


